
AWS: Identity and Access Management
aws wwe Long story short: in Redshift at work, the default when you create a table is that the table is private to you unless you decide to grant permissions to other users. However, for those of us using Hive, this is not the case: instead, we all use the same user account, which has damn-nigh admin privileges, and we store the external table data in an S3 bucket that is accessible for reading/writing by a much larger, extended team. Why such sophisticated user and group permissions in Redshift, but not in S3 or Hive? My goal is to figure out how to develop more granular permissions for S3 and Hive users such that the defaults are more like we have in Redshift (and ultimately make the case to our AWS admins/overlords).
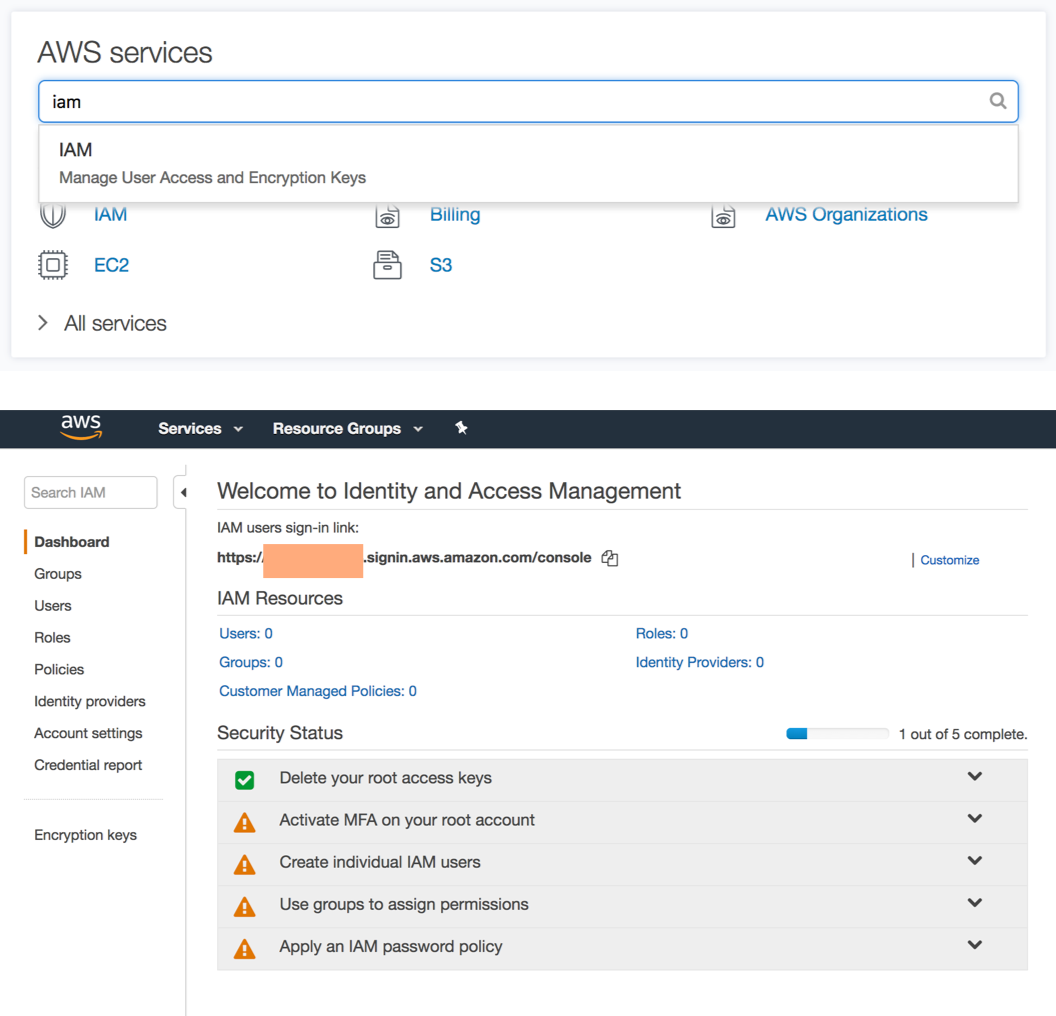
Type “iam” into the AWS services search bar and click on the IAM service.
To create a user, click on “Users” in the left-hand navigation bar, then on the next page click on “Add User”, and choose a username and access type:
- Programmatic Access will generate an access key and secret access key
- AWS Management Console Access enables a password sign-on for a user
Here, we give the user only “programmatic access,” which means they cannot sign in through the AWS Console, but instead must use the AWS API, CLI, SDK, etc.
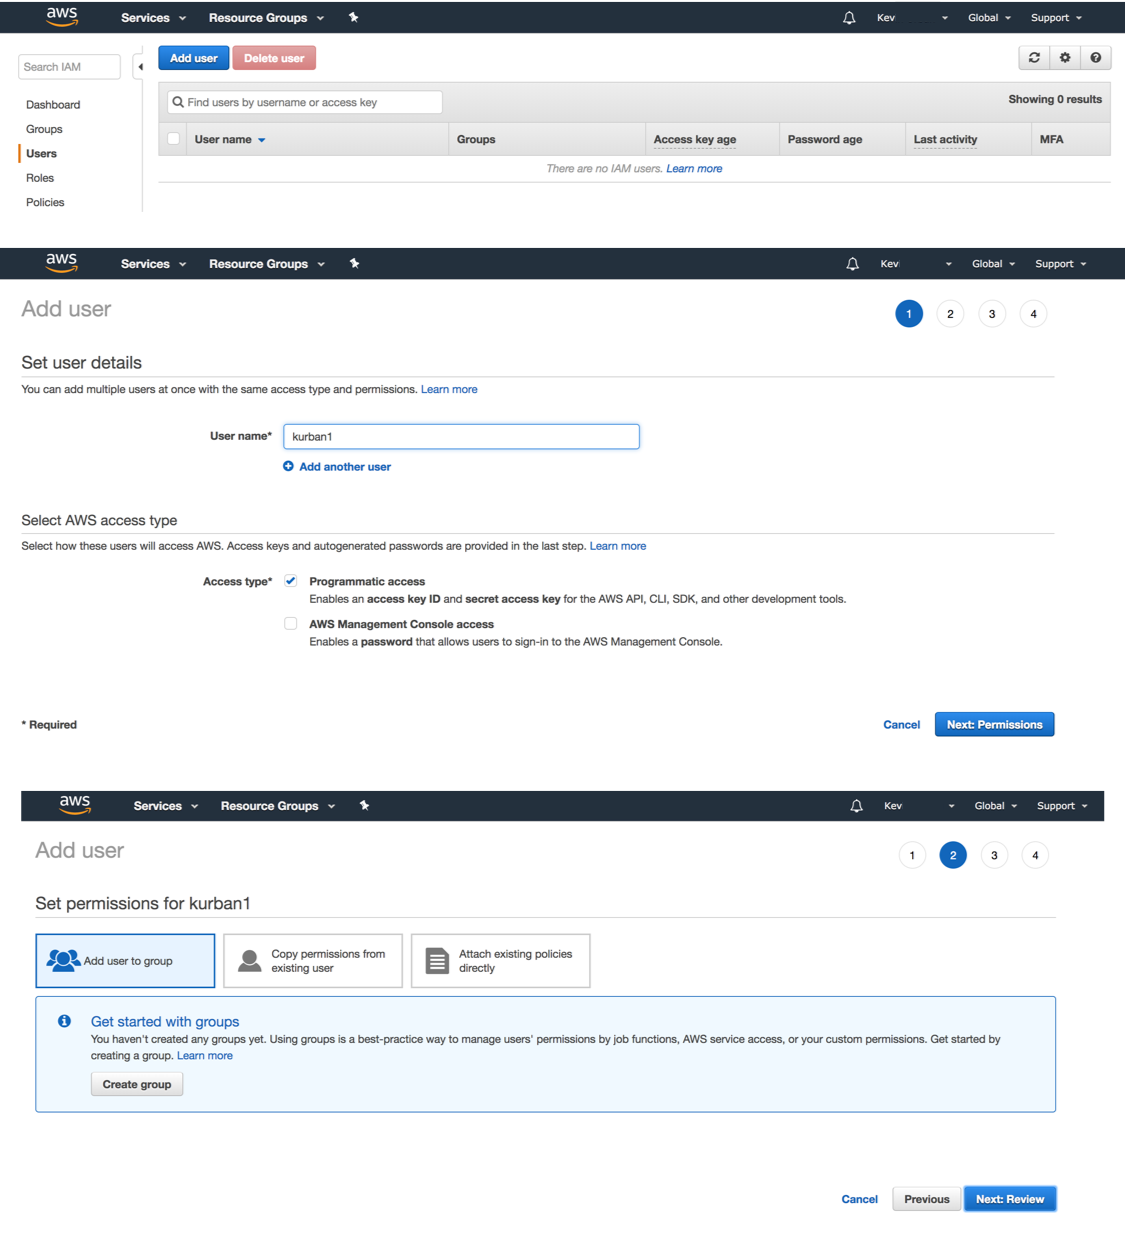
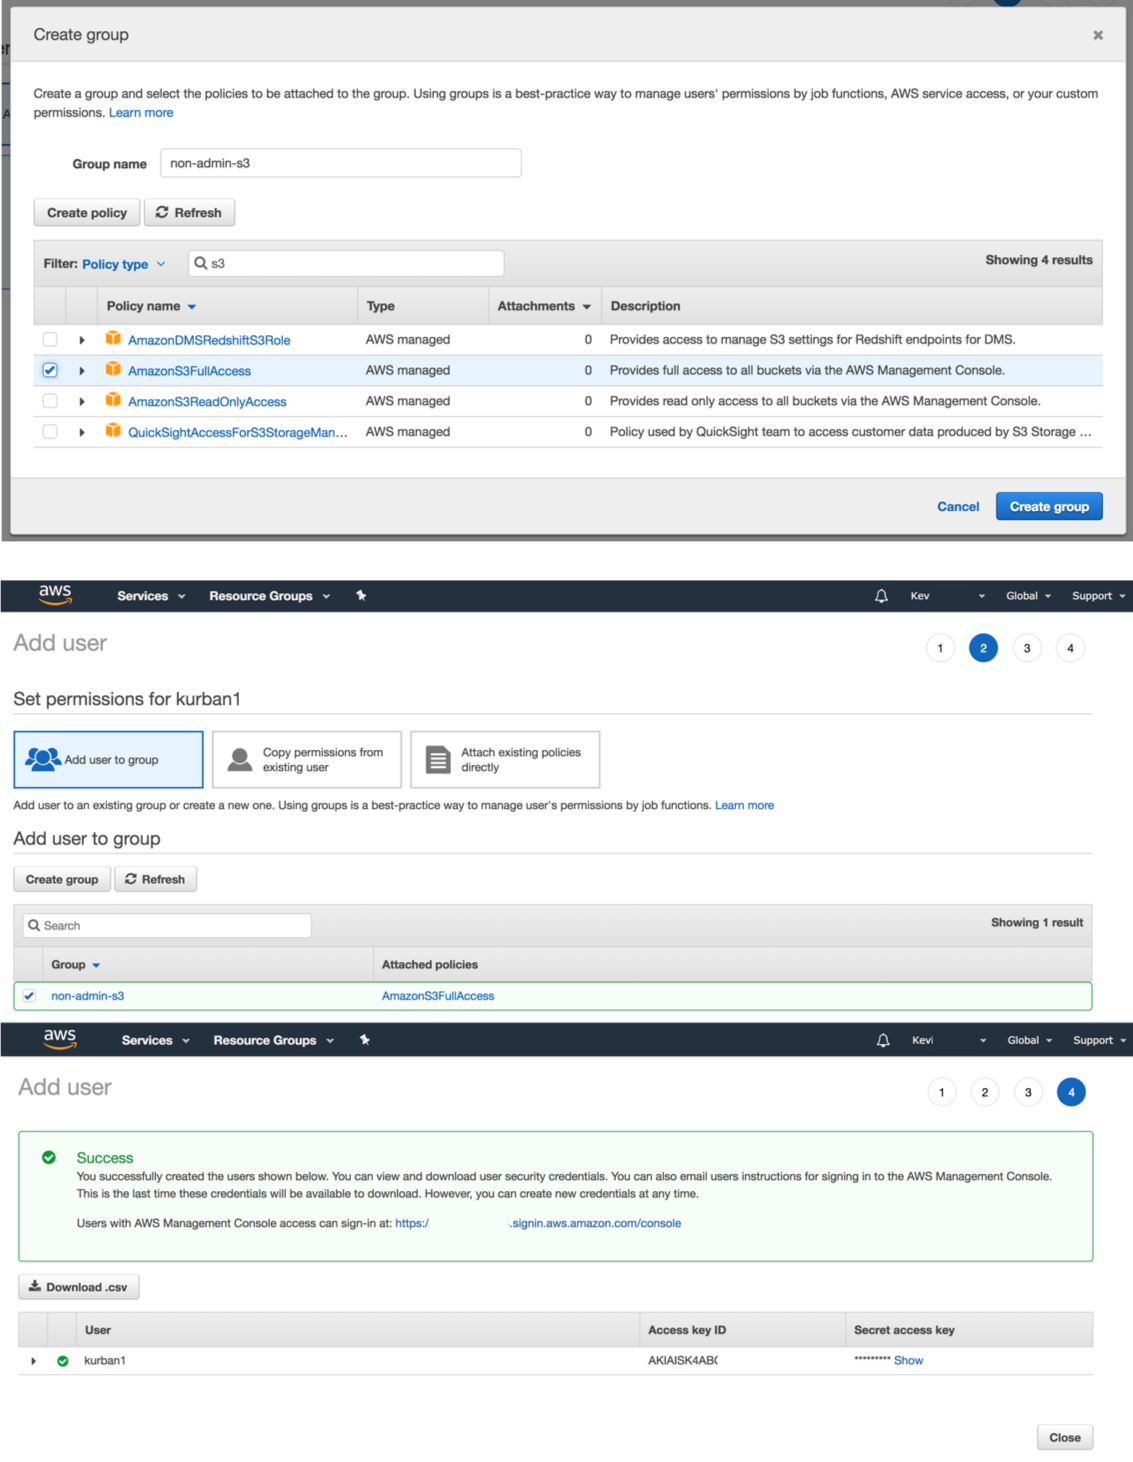
When you click on “Next: Permissions,” you will come to a page where you can add the user to a permissions group (among other options). If you have not yet defined any user groups, you will have the option to do so now: click on “Create Group”, give the group a name, and assign the group a policy (either customized or preset). Here, we give our new user full access to S3 (and nothing else!).
After group is created, click on “Next: Review” and then on the next page, “Create User”.
Now that the user is created, and has been added to the newly-created S3-related group (non-admin-s3), the user’s Access Key ID and Secret Access Key are available top copy down (or download a CSV).

On the same screen, you will find a link that the user can use to sign in – if that user was given the username/password Console privilege, which our user was not. Note that this sign-in URL is different than the regular Console sign-in page that a root user signs into. Also note that the identifier in the URL is the account number, and it is generally a good practice to customize the URL and take out the account number (the less info you give out publicly, the better!). To customize the URL, just head back to the IAM main page where the IAM users sign-in link is displayed along with the option to customize the link.
Back on the IAM main page, you can now see that you have at least one user and one group created.
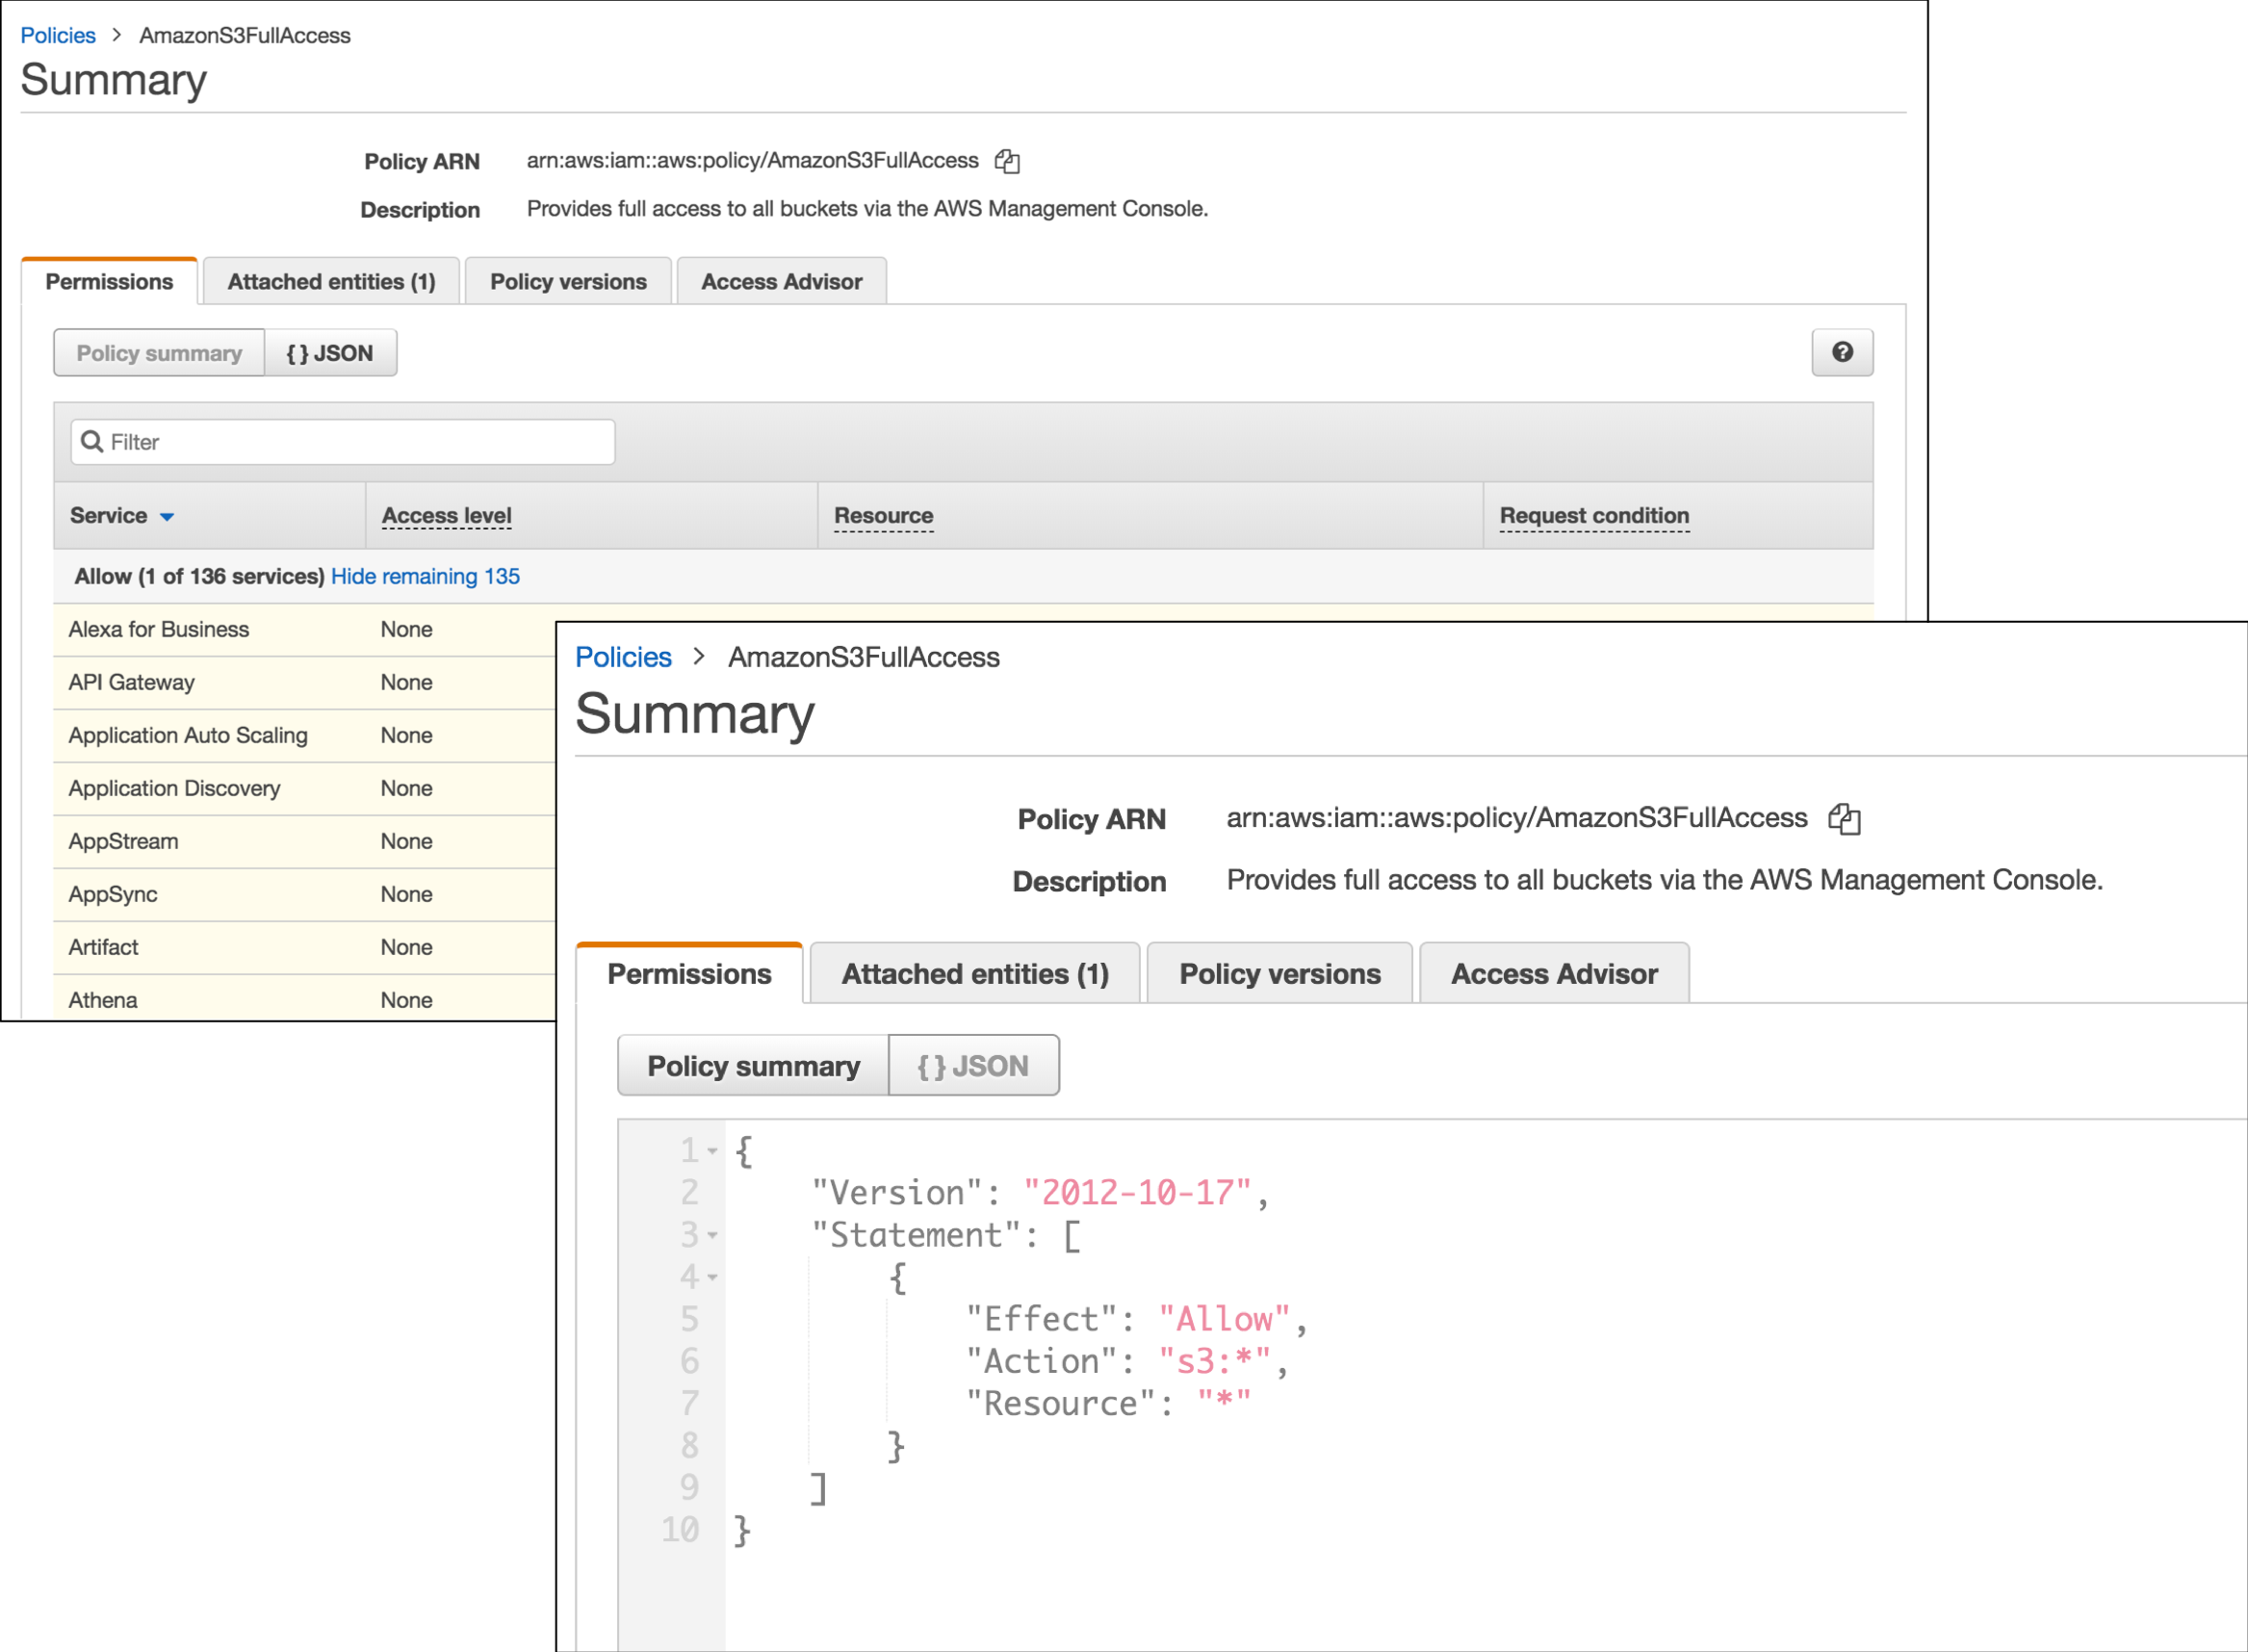
You can see the group policy, which is a JSON file…. Click around: you’ll find it!
You’ll find that the user has permission only pertaining to S3 and no other AWS service. To see that this is true, create another user, but this time with Console sign-in permissions, and add them to the same group (non-root-s3). Then sign in as that user on the IAM user sign-in page and click around.
Gist: Basically, this is like Linux Administration
This process is a GUI way of creating user and user groups, like I’ve done with Linux in the past. However, it is more powerful in that many default policies already exist (don’t have to constantly reinvent the wheel or think through every possibility, etc).
There is one email per AWS account, and that email/password combo represents the root user. That is, if you are signing in with your email and password, you are acting as the almighty root or a demi-root with SUDO powers. Just like signing into a Linux server as root is frowned upon, signing in at the AWS root is not considered a best practice. To be safe, signing in as root should require multifactor authentication (MFA), e.g., 2-step authentication. The best practice is to sign in as a user with much less power and permission, like the user account we just created.
Some might complain that they “need” to use the root account, but the Lynda instructor points out that the lists of things that this is true for is actually quite small.
Best Practice:
- create user accounts
- create groups
- create policies (preferably with conditions, e.g., time or IP constraints)
- associate policies with groups
- add users to groups (exercise law of least privilege!)
- set a password policy
Instead of logging in as root, it’s better to create an admin account that has all but the rootiest of root permissions, and login as that. Also a good idea to have MFA activated for any admin account.
Custom Policies
AWS default policies are good for learning and playing around with, but in a production environment, you probably want to tailor the policies to specific needs and tradeoffs.
Thought this was funny (from Lynda video):

Some bullet points (might or might not make sense out of context; no promises):
- Who/Which = Principal/Resource
- object name + ARN (Amazon Resource Number)
- “Do you want to give permission to all of S3, for example, or just one or two buckets?”
- What = Action (what are they allowed to do?)
- When = Condition (e.g., time or IP constraints)
- highly granular permissions can become time-intensive, but it’s worth the effort: at the very least, restrict by service (e.g., “all of S3, nothing else”) – that’s better than giving everyone, everything!
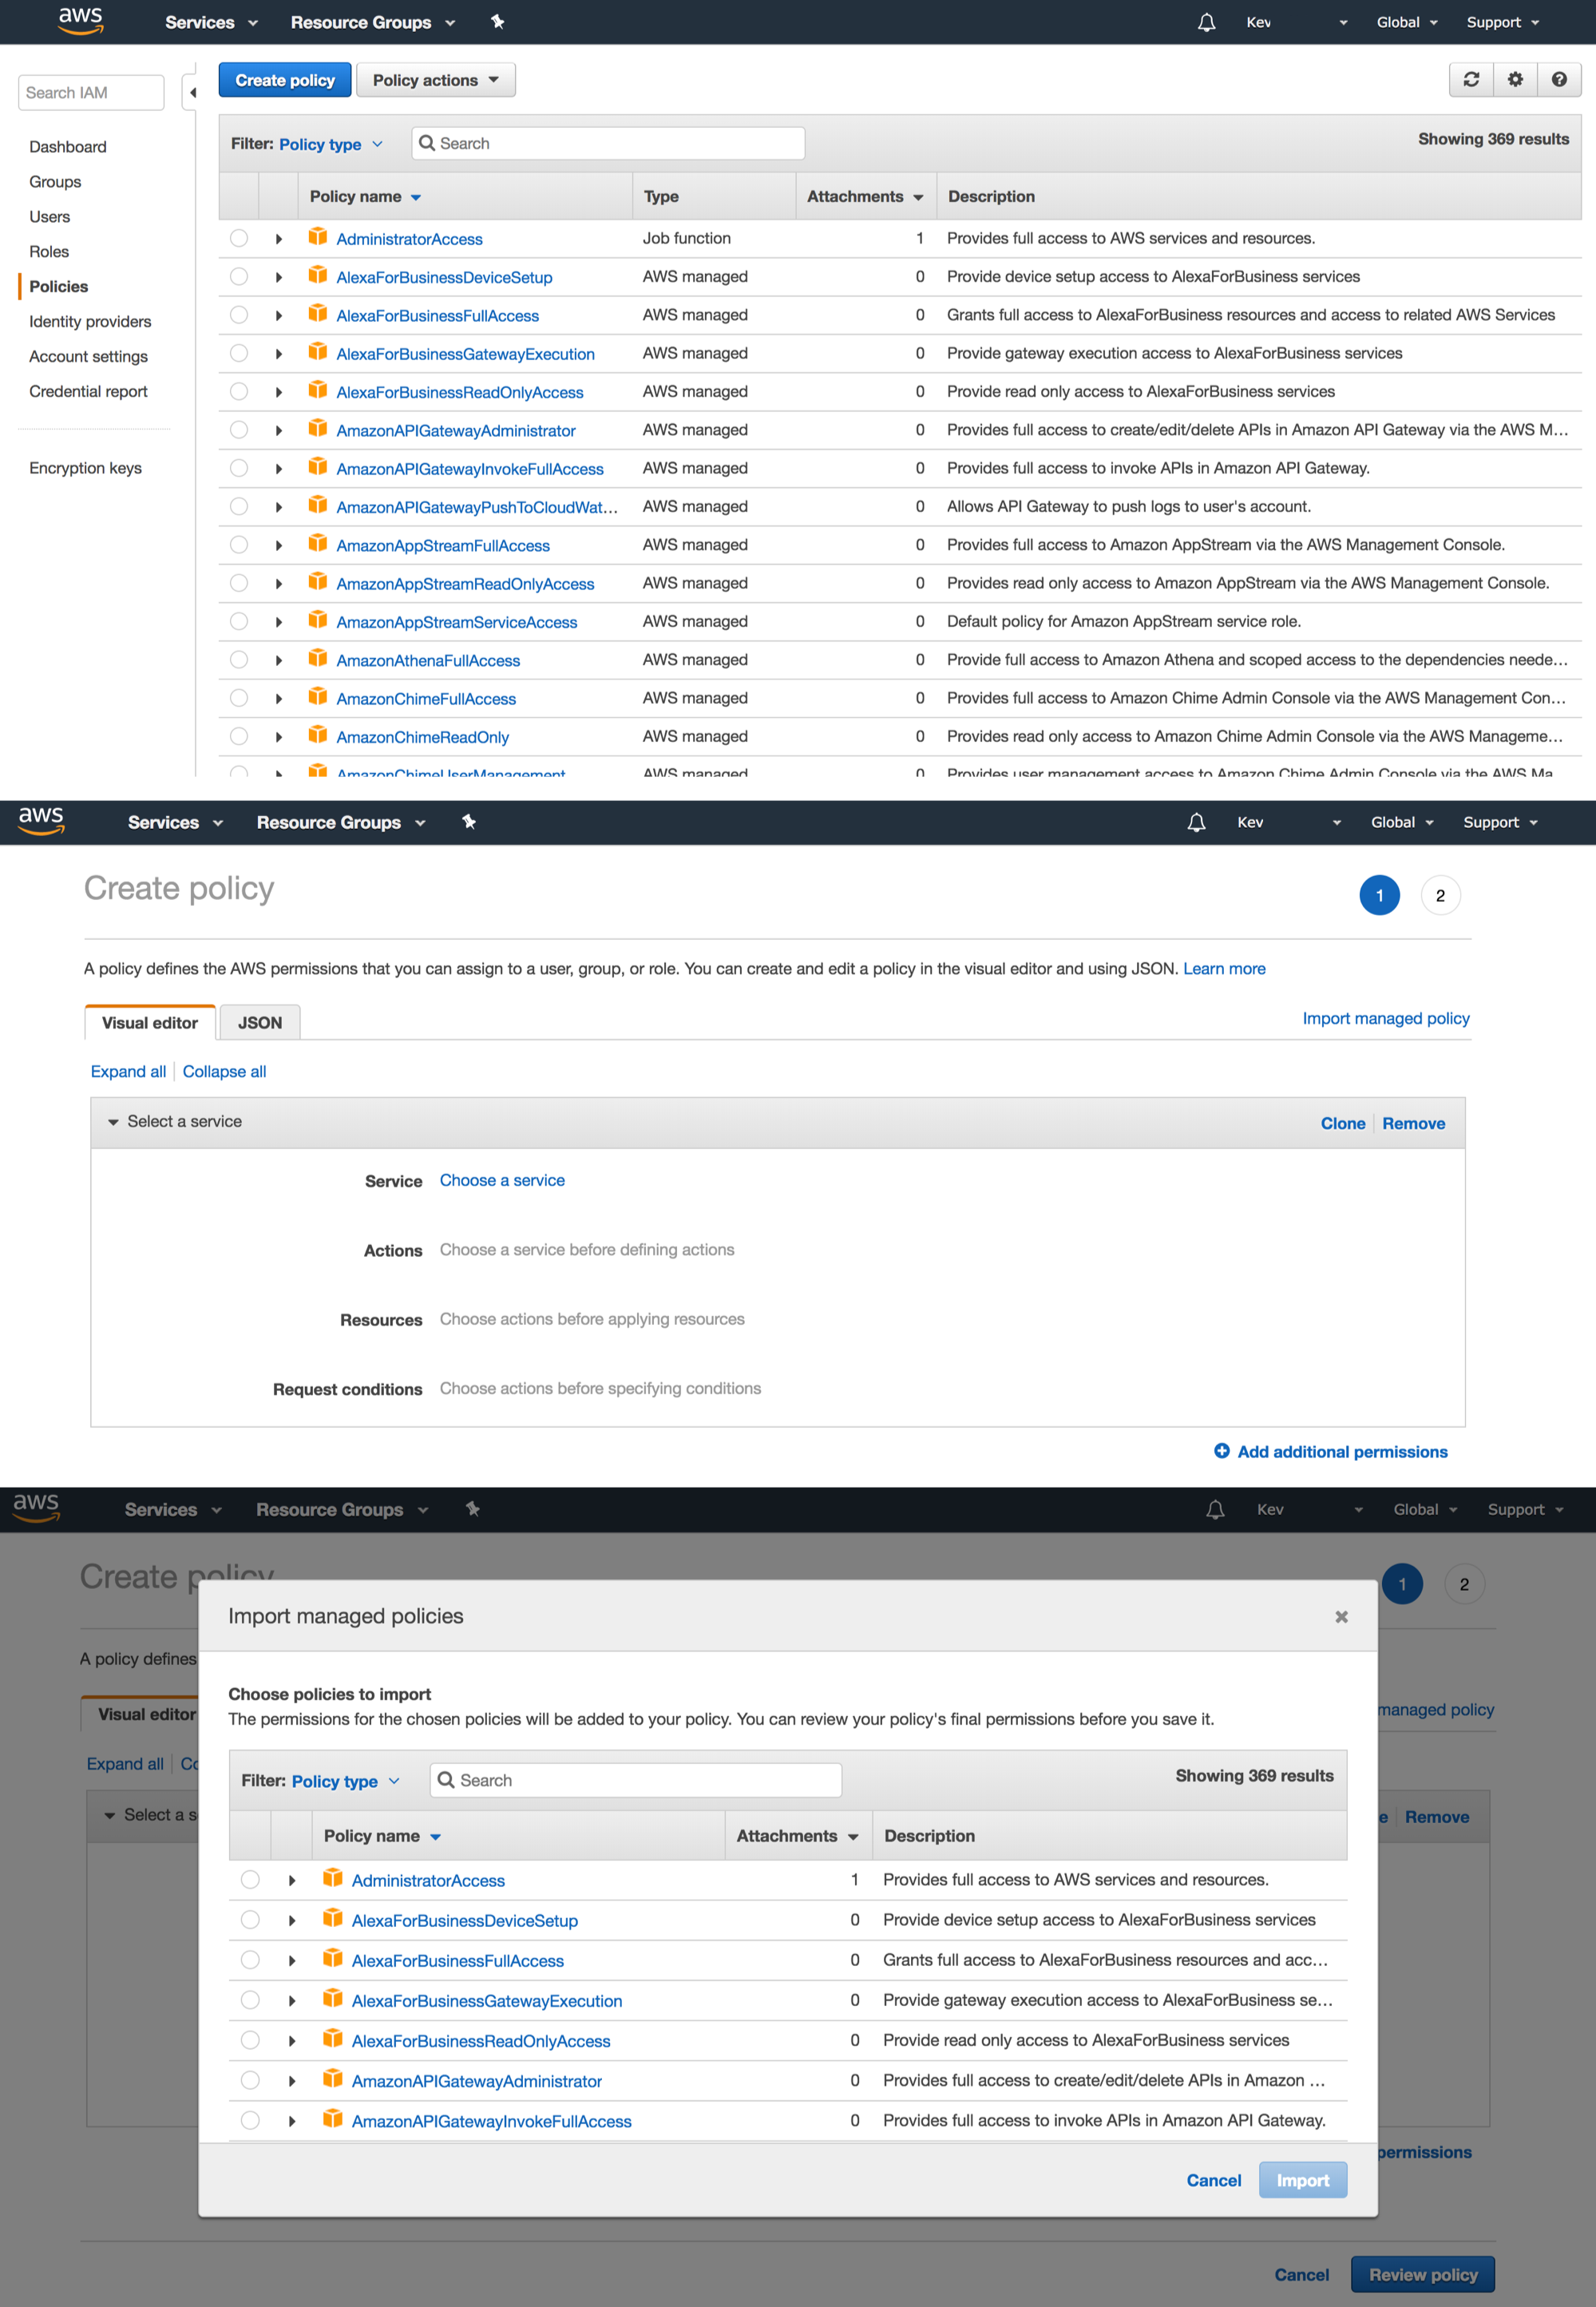
To look at all the available policies, click on “Policies” in the left-hand nav bar on the main IAM page. “Wow,” you should be thinking, “That’s a lot of policies!” Fortunately, you can use the Policy search bar to search for policies related to specific services. This is where you can create custom policies too. Basically, it is easiest to start by importing something close to what you want. For example, here is the JSON representation of read-only permissions to S3 (and no permissions for any other service):
{
    "Version": "2012-10-17",
    "Statement": [
        {
            "Effect": "Allow",
            "Action": [
                "s3:Get*",
                "s3:List*"
            ],
            "Resource": "*"
        }
    ]
}
The Policy Simulator
This is pretty cool: basically, you can choose a policy, then choose services and actions to see what happens: allowed or denied? You can test existing policies here, or create new custom policies to explore.
Finished about half this course:
Get back to it another day!